hko

Monday, December 1, 2014

I'm a poet & I sorta know it

I've been writing all my life, whether it be short stories, the first few introductory chapters to dead-end novels, or free verse poetry. Some of my most peaceful memories are of me, twelve-years-old, sat behind the computer screen with line after line of text glowing back. When I was in high school I was a part of my county's specialty arts program- I took specialized courses throughout my four years for creative writing. Quite a few of my best friends are from those very classes. I think some of the strongest bonds are made through the connectivity art provides. When you create art, you reveal your conscience and transmit it through an interpretable medium. I spent hours with these girls sharing words from the depths of my soul, and in turn I was able to indulge in theirs. In my head I romanticize these interactions and liken them to the friendships of the Lost Generation. We were like a bunch of jaded expats sitting in the dusk of a Parisian night, sipping red wine and musing over the temporariness of life.. passing typewriter manuscripts with coffee stains between hands and occasionally adding dashes of our own ink. 
Not really.
I don't know where I was going with all that. I guess I was trying to relay how much I valued their friendship and critical input when it came to my writing. When I went to college I took an introductory course for creative writing in my first semester. I didn't take any more thereafter and would only write sparsely. The other day I was browsing through some old files and found a few poems tucked away. I thought I'd share one, just for the fun of it. Don't judge too harshly- I rarely write anymore so my poet brain is rusted. 


OF LATE

enough
plenty- a full, filling serving of dissatisfaction,
at the edge of the cycle
the restart of submission.
i can't do this anymore and i kindly ask for you to
stop fighting it. 
just let it unfold and slowly chew,
chew, loosen your tongue, file your teeth
& swallow. 
digest- understand that i do understand you;
submit to my decision to defy your submission.
new seeds will settle themselves into the
flesh of the earth,
explore and filter the soil with their roots, 
blossom into bright bulbs
that will respect promises, 
keep your heart in theirs. 
yes, i've lost it- gone off the rails
and plundered into the murky abyss of mishaps
and misshaping. too many hands
pulling on nonexistent ropes 
but i've got it on my mind.
which means i've got it in my soul
to kiss and taste him
repeatedly, like a candy-coated broken record.
tender ideas unlike calloused knuckles
(wearing the brand of relentless kneading,
failed attempts at flawlessness)
and this idea of him is mine-

something you never were. 

Thursday, November 20, 2014

Stop & Breathe

After writing enough academic papers to publish my own encyclopedia (predominately on the subject of Adenovirus-36 induced obesity), recording my thoughts on here is so refreshing. I am uninhibited and free from subject compliance. The latter part of November, just before Thanksgiving break, has continuously been the most stressful part of the semester. Finals week is a close second but the open schedule and freedom from classes makes it more tolerable. I feel very overwhelmed & whenever this happens I have to remind myself to stop and breathe. Everything may seem beyond repair but nothing is ever so broken that it cannot be fixed. "Let go and let God." I regain my sanity knowing that He's looking out for me and everything will work out as it should. There is nothing more comforting than the love of God.

Anyhow, little update on what I've been getting up to (besides attending class & schoolwork):

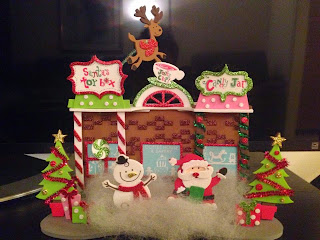
The boyfriend & I loved making those little holiday houses before that we went back and bought a couple more for his apartment! We got glitter all over the place but the results made the mess worth it (at least in my opinion.. he may not agree considering that stuff doesn't go away for a long time).

This is from a couple weeks back but I came across the photo on my phone and had to share how adorable this little coin purse from Kate Spade is! Cute but pointless. All the best decorative things in life seem to serve no purpose other than to look good (which means they're doing their job perfectly).

This isn't my picture. I'm pretty sure I screenshotted someone else's Instagram photo because their cake looked so dang good. Donuts.. strawberries.. and cake?! All of my favorite edible things have been compiled into one delicious pink sugar bomb. This has to be reconstructed in my kitchen one day. 

Friday, November 14, 2014

Baking & Building

I know that it's been some time since I've posted on here & a lot has happened in my life that I'd like to share with you. You should see me when something exciting happens nowadays- I whip out my iPhone and say, "Wait! Let me take a picture! I wanna blog about this". I actually brainstormed a list the other evening about post topics. So believe me when I say that I have a lot planned, my only shortcomings in being a blogger are my semi-busy life and sheer laziness. 

The Holiday Season brings with it so many goodies in so many forms- there are candies, cookies, cakes, pies, breads, etc;. When the first chill bites my skin through my knit sweater I know that it's time to pull out the Christmas sprinkles and preheat the oven to start baking. The other day I picked up a pumpkin pie bar mix from Krusteaze that has a gingerbread cookie crust. It. is. SUPERB. It was also quite simple to put together and quick to bake. 

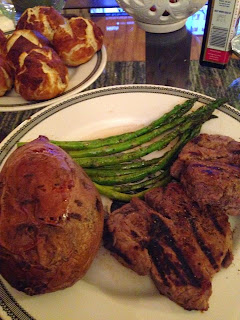
Along the lines of cooking- this weekend my boyfriend and I took turns cooking dinner for each other and the results were tasty. I did a shrimp scampi and he did a steak dinner with sweet potatoes and asparagus!


Cold weather is also an indicator to me that the decorations ought to come out. As a young adult who moves frequently, I don't have a collection of holiday decorations compiled over time to call my own. I tend to pick up a couple things here and there. On Halloween my boyfriend and I found a little kit in Target for a miniature themed house made of foam pieces. It was like a 3D puzzle with glittery stickers that finished impressively. When I saw Christmas houses at Michaels I knew purchasing them needed to happen. The other evening we took time out (collectively 3 hrs, to be exact) to watch some films and build them! The gingerbread house was for ages 3+ with some 120+ pieces and actually took longer to build than the little shop, which was for 6+ and had 240+ pieces. The age recommendations on those projects is absolute madness. If it takes two 23-year-olds a few hours to build them, then I highly doubt children could do it on their own. Also, 3-year-olds should not be playing with toys that have little pieces because I'm pretty sure that's still in the everything-goes-in-my-mouth stage of childhood. Someone made a comment which was so spot-on- "that's for the parents of the 3-year-old".. Precisely. 


Lastly, my roomies are babysitting their friend's puppy for a week while he goes back home for a wedding. It's an English bulldog named Titan who is only 6 months old. His proportions are so unbalanced it's almost comical. He trips over his own paws and falls forward because of his massive head! I love puppies but this guy seems like a handful and a half.

Friday, November 7, 2014

BUT..... BOOTS.

Quick impromptu post because I saw two amazing pieces of foot art... NOT shoes... FOOT. ART. I love you, Jeffrey Campbell. They're both dupes of couture labels but that doesn't change the fact that they're still of awesome quality, still steeply priced, and still marvel-worthy. 
Note: I know these shoes aren't to everyone's tastes. They're definitely statement-y and loud.. but that's exactly what I adore about them.

From Alexander McQueen's (one of my ABSOLUTE favorite designers, might I add) AW14

& then spotted on Nasty Gal..


Saint Laurent Studded Ranger's Boot 
Collection by Hedi Slimane (one of my all-time favorite fashion photographers)
$2,395


& these were spotted on Nasty Gal, too.

SO, what do you think? Which ones should I go for (& please do not say the McQueen or YSL boots because the prospect of buying them is so unrealistic it'll break my heart- I need a big girl job first)? I'm feeling the Johana Leather Boot because of their simplicity/ practicality. If only I could have all of the shoes in the world.. 


Thursday, November 6, 2014

Remedies for Rainy Day Blues


It goes without saying that the recent weather has been bittersweet. It feels amazing to have an excuse to cuddle up with a warm beverage and some Netflix, and even more enjoyable to fall asleep to the soft pitter patter of raindrops on your windowpane. However, I always get into this weird funk when wet weather pervades for longer than a few hours. My list of grievances begins with the most irritating of offenses caused by rainstorms- soaked pant legs. This used to be of greater annoyance when flares were trending.. because there was so much excess material to soak up puddles like a sponge. And your pants would just stay wet for hours because denim takes ages to dry out.. and if you crossed your legs then any contact between wet material and dry material would cause a spread of overall miserable wetness. 
As you can tell, I seriously despise getting my pants wet in the rain. I'm entirely off-topic now. I wanted to make a short post to share my personal remedies for any rainy day blues you may contract. To my dismay, these activities can't help your pant legs dry out.

Paint Your Nails
I was inspired by my favorite character BMO from Adventure Time. I know they look a little uneven because I freehanded them (also, I purposefully wasn't trying to paint tips- I wanted to fill the top 1/3rd of the nail with the glitter& that's why it's so thick!). I did a heavy first layer of Re-Fresh Mint by China Glaze and then covered it with their matte top layer, called Matte Magic, so there'd be a greater texture contrast against the glitter paint. Then I added the glitter polish called This is Tree-Mendous, which is also by China Glaze.

Sketch & Design
If you know me at all, you know that I have a very fashion-conscious mind and one of my favorite pastimes is creating and designing my own clothing/ accessories. My sister bought me an awesome fashion sketchpad with body stencils already printed on the paper. I used to freehand these or print off templates from the internet but it's so much more convenient to have a ton of them available and all compiled together. This is a more haute couture design I came up with- the squiggly area is black lace, the bodice of the dress is encrusted with gems, there's a large bow detail on the back, and the skirt of the dress is fluffy with a lot of body and volume. I envision this in all black with contrast from a range of fabrics (i.e. lace, organza, velvet). 

Shop for Seasonal Decor
 
Look at this awesome lantern I picked up from Marshalls in the Christmas section! My two favorite animals are deer and foxes so purchasing this was an absolute must for me. I know it's intended for the holiday season but you can be sure I'll have this out year-round. I only paid $15 as opposed to the retail price of $25. I love that each glass pane has the cameo print on it and that the overall construction of the lantern is quite large.

Drink Tea
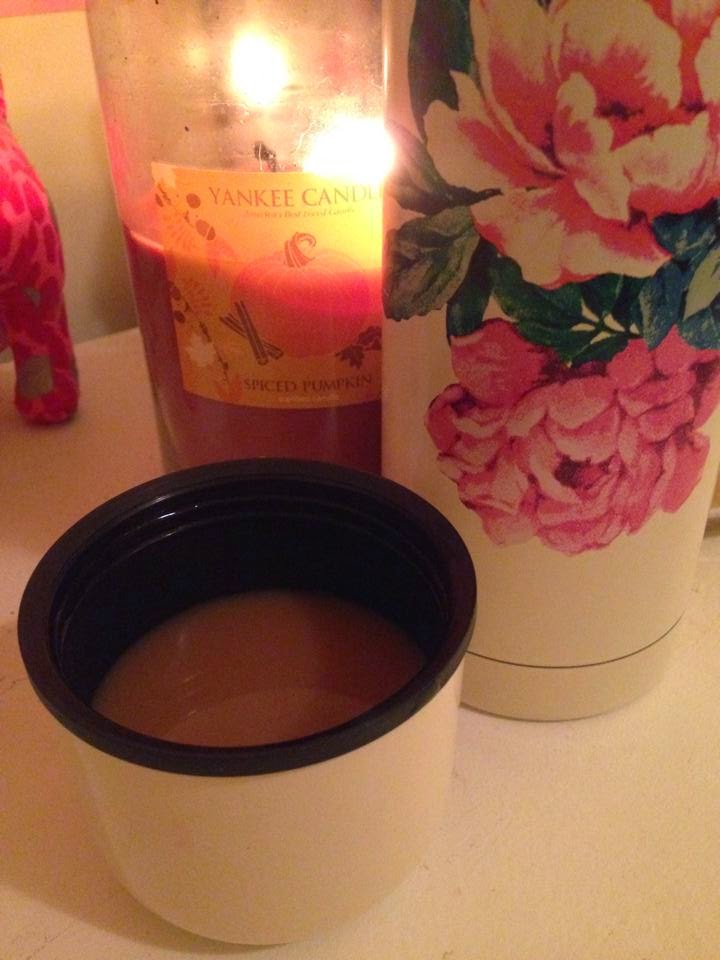
I get excited when I can drink out of my cute floral thermos that I purchased back in the summer from Target. It's part of the Poppytalk collection and perfect for storing generous servings of your favorite caffeinated beverage. I'm a bit of a sweet tooth so instead of using milk for my tea I use coffee creamer. I purchased Coffee Mate's version of pumpkin spice creamer the other day and am only now just testing it out. I LOVE IT. Now I can have a seasonal-flavored drink at any time I please without having to drag my lazy self to Starbucks. I will be stocking up on this creamer before the end of December so the pumpkin consumption will never cease!

I hope I gave you all some ideas on how to kill any boredom this lackluster weather may invite. I think I'm going to stay in bed this evening, drink more tea, eat some soup, do some homework, and then fall asleep to Turnover. 


Monday, November 3, 2014

A little gold can make all the difference..

I have so much to post about after this Halloween weekend. I travelled to Washington, D.C. with my boyfriend for my sister's birthday/ dress-up party and then stopped by my home on Sunday to have a tasty brunch with my parents. Exploring the city with my boyfriend (no doubt with Starbucks in hand) is one of my absolute favorite things to do. I'll go into more detail in my next post. As for now, I'll brag about how happy I am with my little purchases from an accessory shop called Charming Charlie. Costume jewelry is a guilty pleasure of mine. Higher quality brands, like J. Crew, Betsey Johnson, and Michael Kors, are what I commonly spend my money on. However, it's fun to pick-up pieces on the side that are in styles that might not be in-season for very long. When this is the case there's no point in spending a whole lot on something you'll get little use of. There is a Charming Charlie near my campus so I swung by earlier this week and took advantage of an awesome sale- you could pick any two clearance bracelets for a price of $5! I snagged 4 bracelets and a pair of simple hoop earrings (I've been trying to find a pair that wasn't plain since they're having a mini comeback).
Hoop Earrings

I think I only paid about $4 for these when the original price was about $10.


Lucite Cuff

I love the look of the gems against the clear lucite material. This retailed for $13 and I purchased this as one of the 4 bracelets I got for $10.

 Skully Friendship Bracelets

I bought two of these, one for myself (white) and the other for my sister (blue) as simple friendship bracelets. They were so cute with their pave stone details and metal band/ pull ties. They were originally $10 a piece.

Chunky Gold Bracelet w/ Black Thread Center Detailing

If you know me, you know that I adore chunky gold accents. This was an awesome find especially considering it was originally $15 and I got it for a mere $2.50. Happy Heidi!

So if you're ever in the mood to pick up cute jewelry pieces at low prices, albeit they are of a lower quality and aren't crafted to last for very long, I'd highly recommend checking out Charming Charlie. Their clearance section is usually vast and varied in style. & as you know, a little gold jewelry can make all of the difference for an outfit!


Thursday, October 30, 2014

First Post! & DIY Lace Cat Ears for Halloween ✌

I've recently come to the conclusion that one creative way to endure my (typically) droll life is to blog. Since Tumblr serves as a virtual inspiration board for me, I sought a more structured/ mature medium in which to share my projects, product reviews, and personal tidbits. Admittedly, I am a person who probably cares far too much about the aesthetics of my environment; as a result I spend a lot of money on needless things as well as a lot of time on little crafty upcycling projects. Now I've established a place to exhibit the 'fruits of my labor' without clogging up Facebook feeds or annoying my Tumblr followers that only want to see reblogged photos from fashion magazine editorials. So that's that and here's me, uninhibited and uncensored.

All Hallow's Eve is right around the corner and I chose to get hot glue on my fingernails and clippings all over the table rather than purchase pre-made accessories. That's a partial lie considering I did buy an American Apparel bodysuit as part of my costume, however I did create my ears from scratch. I snapped some quick photos throughout the process in case anyone wanted to try their hand at lace cat ears as well :o) They turned out rather spectacular!


DIY Lace Cat Ears
I needed some ears for Saturday night and I saw these on ASOS (so precious, I know), but due to their seemingly simplistic structure I felt more inclined to make them myself.

Here's what you'll need:
~ thin black ribbon  (at least 3 ft for one set)
~ black plastic headband
~ black duct tape (highly suggest the 3/4 in. width)
~ florist wire
~ 1/8th of a yard of black lace
~ hot glue gun (not pictured)
~ black sharpie (not pictured)

Step 1:
 Create the shape of the ear that you want with the wire- it can be any size you'd like. Cut two pieces of wire equal in length based on the ear shape you've created (I have four shown here because I was making two pairs of ears). but be sure to leave an extra inch and a half of wire on either end (my ears had a perimeter of about  5 1/2 inches with 1 1/2 inches at either end for a total length of 8 1/2 in). 

Step 2: 
Cover the outstretched pieces of wire with a strip of duct tape to thicken them and to provide support for the ear shape. Leave the the 1 1/2 in tails on either end uncovered. This was a bit tricky but I figured out that pinching the tape around the wire continuously allowed for a tighter and more even wrap.

Step 3:
Get your gluing station ready! First, reshape your cat ears and bend the uncovered wire ends at 90 degree angles as if to create upstanding prongs. Also, cut out small squares of lace for each ear.

Step 4:
Put a dab of glue at the peak of the ear as well as the bottom two corners at the junction of the covered wire and uncovered prongs. Press the shape down onto a square of lace. Once it dries, cut around the wire leaving a centimeter margin of lace at the sides and a 5 centimeter margin at the bottom. I don't show the next step, but place hot glue around the back of the wire and fold over the excess centimeter of lace to completely cover the exposed wire ear shape. 

Step 5:
To give you a more clear representation of how to attach the ears to the band, I took a photo of the shape without the lace or tape covering it. The prongs were left so you could use them to wrap around the band and connect the ears to them. Make sure both ears are placed an equidistance away from the top center of the band (I counted the little inner teeth from the bottom of each side to ensure congruence). I covered the exposed wire that was wrapped around the band with pieces of duct tape. Don't want any rough edges rubbin on your head!

Step 6: 
Once the ears are attached, pull the extra 5 centimeters of lace at the bottom of the ear down and over the inside part of the headband so the lace within the wire frame is taut. Apply hot glue over the material that is pressed against the plastic and snip the excess so that no lace is showing past the inner rim of the band. Next, take your black satin ribbon and tape the end of it to one bottom side of the headband. Wrap it around all of the exposed plastic and over the pieces of duct tape that are covering the wrapped metal prongs of the ears.

Note: I had to wrap for three separate incidents- for the bottom left (snipped the ribbon off at the intersection of the band and ear and glued the ribbon down), for the space between the ears (hot glued the edges of the wrapped ribbon), and then for the bottom right (hot glued at this intersection too and then taped at the very end to complete the ears!). 

Tip: Use the black sharpie to color in any apparent white edges from the duct tape!

Now you're done!
The supplies amounted to a total of about $15 and I had enough material to make five pairs of ears! The one set from ASOS costed over $18 not including shipping. So you will save money but more importantly you will have fun making them yourself!
Enjoy :D